
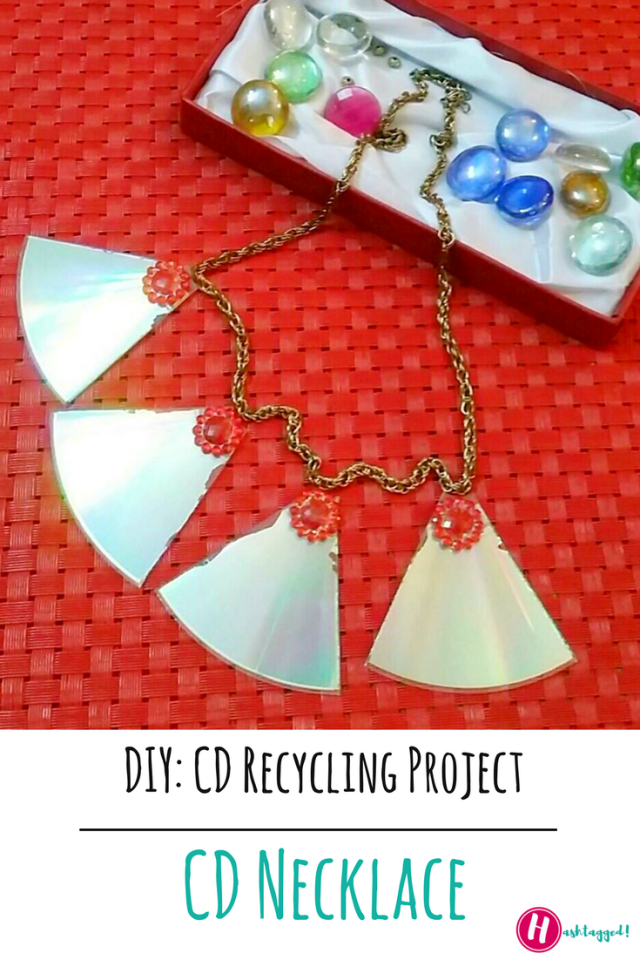
Yesterday, I shared one of my pictures on instagram flaunting this chic CD necklace and as promised, now I am sharing the DIY here. I started a CD recycling project a month back and published two posts featuring a candle holder and a jewelry box. This post is a follow-up of that series!
Although I am a minimalist when it comes to jewelry but I always look out to unique pieces which help creating an effortless yet glamorous look. Beside basic staples, you would find a few loud baubles which I occasionally but ardently wear. I came across a statement sparkling mirror necklace online and thought about recreating the same piece but with a CD. The end result is this ritzy-glitzy necklace which you can make in a few simple steps!
THINGS YOU NEED
- A CD.
- Measuring Scale.
- Scissors.
- A thick metal chain (You will find it in your jewelry box).
- A small nail.
- Golden electrical thread-Check your Dad’s or Brother’s tool box, they would definitely have it. If not, ask them to get you some.
- Bold marker.
- Forceps.
HOW TO DIY!
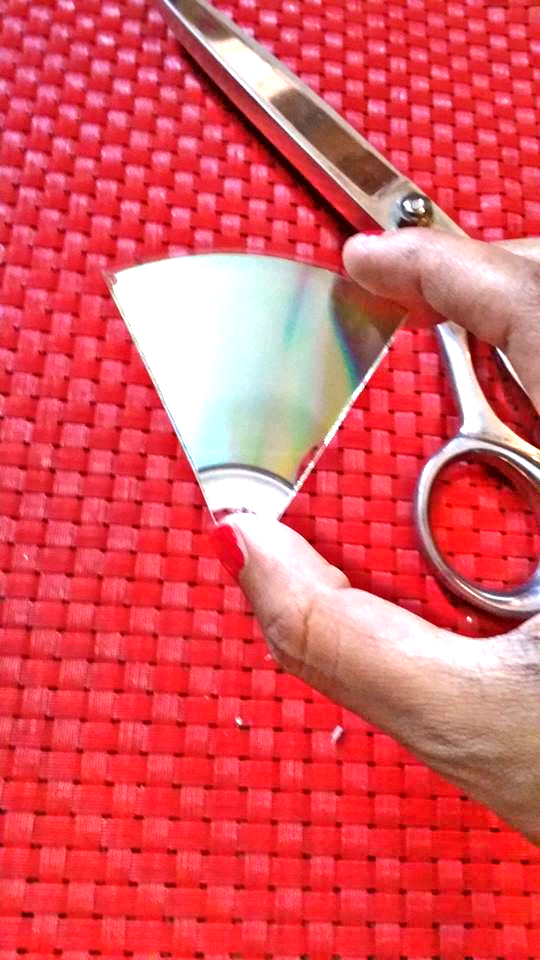
Mark four adjacent points across the CD and draw intersecting lines as shown in the picture. Once you have equal sections, draw another line inside each triangle of whatever width that you want. I drew a line at one fourth of the section because I didn’t want my necklace pieces to be too wide.


Cut along the marked lines and you will get small sparkling triangles. Try cutting slowly and neatly else the CD can break by quick, rugged attempts.

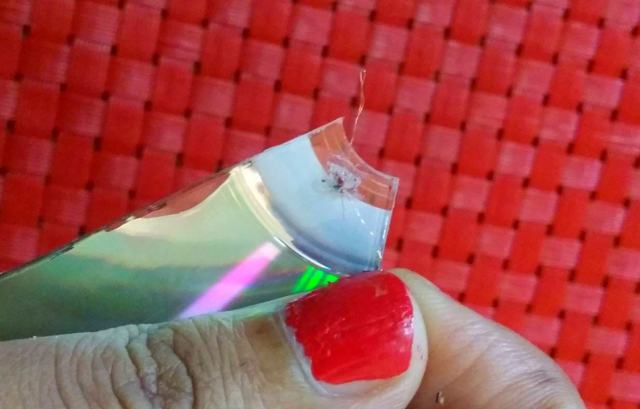
Now comes the step where you have to practice a little caution. Once you have cut all the pieces, take a nail large enough to be held by forceps and heat it over flame-either candle or stove. Once the nail turns bright red, press it instantly at the matt edge of the CD as shown in the picture. Keep the nail for a few seconds on the edge until the nail cuts through the surface forming a hole. You need to quick press the red hot nail on the surface before it turns lukewarm. I know it’s the only difficult step of the process and I got it right on the second go, just make sure you don’t end up hurting your fingers.
The nail in the picture is not red hot as I couldn’t have taken the shot instantly. I have shared this image just so you know where to press the nail.


Now draw the electrical thread into the hole because we need to tie the CD pieces to the chain.

You must have two free ends of the wire through the CD hole. Take a chain, pick both ends of the thread and twist them to make a knot. Keep twisting until a tight knot is formed. The electrical thread is quite soft so you shouldn’t have any issue twisting the ends together.

After tying all the CD pieces around the chain, this is the necklace that you get! I opted for four piece necklace, but you can add more or even cut smaller pieces as you like.

As top matt part of the CD looked quite raw, I decided to embellish it with red beads which looked very fetching. You can do the same or also paint that section with a spray.

This DIY is a little technical but you can do it by following the procedure carefully. Ask away if you have any questions!
And here is the throwback to when I sported this necklace to a blog event. There is another thing I am sporting here-of course long locks! Man! I miss them sometimes!

Let me know if you would like to see more CD DIY! Have an awesome day!
She can be reached at https://linktr.ee/hinailyas
- Are Google Certificates Worth Your Career Investment? - May 5, 2024
- How to Find and Fix Broken Links: A Comprehensive Guide - April 26, 2024
- Dynamic Pricing Strategies: Using AI to Optimize Pricing in E-commerce - April 9, 2024


0 thoughts on “DIY CD Recycling Project: CD Necklace”